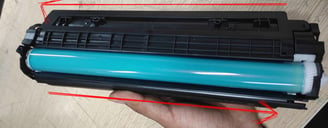
Toner Cartridge: A Comprehensive Guide to Components, Functionality, and Troubleshooting
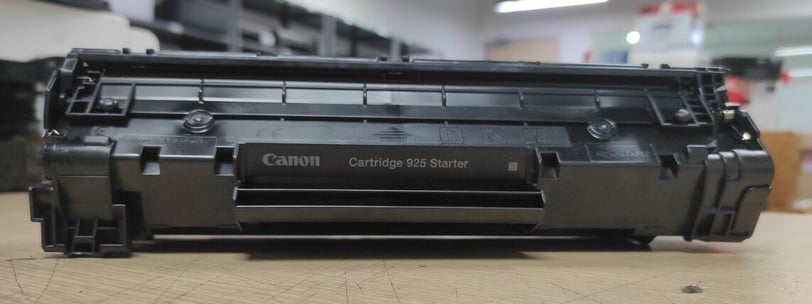
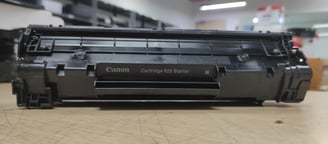
A toner cartridge is a replaceable component used in laser printers, and copier machines. It contains magnetic toner powder, a fine dry mixture of plastic particles, carbon, and coloring agents. The toner is transferred to paper through an electrostatic process, which the printer or copier uses to produce text and images.
Praveen Kumar - Canon Printer Specialist
10/2/20244 min read
Toner cartridges are vital components in laser printers and copiers that produce high-quality text and images on paper. As a certified printer specialist who has serviced over 5,000 printers, I've found that understanding how these components work can help users troubleshoot common issues, improve print quality, and extend cartridge lifespan.
This guide provides detailed insights into toner cartridge components, functionality, and expert troubleshooting solutions based on my professional experience.
Understanding Toner Cartridge Technology
A toner cartridge contains fine magnetic powder (toner) composed of plastic particles, carbon, and coloring agents. This powder transfers to paper through an electrostatic process controlled by the printer or copier.
The Printing Process:
The toner powder is applied to the drum unit, forming an electrostatic image
The toner transfers to paper using a precisely calibrated electrical charge
A fuser unit applies heat to melt the toner onto the paper, creating a permanent image
Right lock and screws
Unscrew both screws and pull out the lock, Please remove the spring carefully as it snaps into place automatically
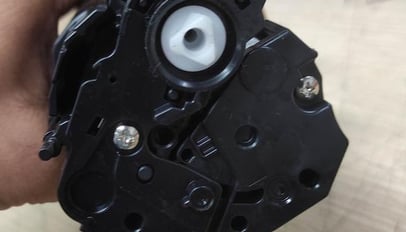
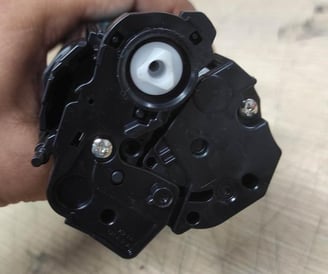
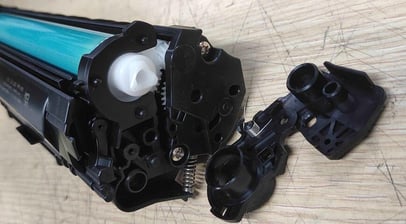
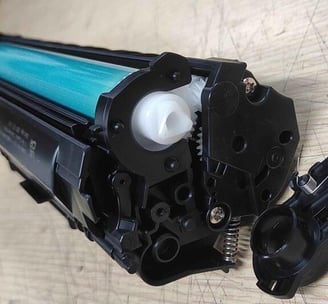
Remove the lock and separate the two parts
Hold both sides and slide one side up and the other down
Essential Toner Cartridge Components
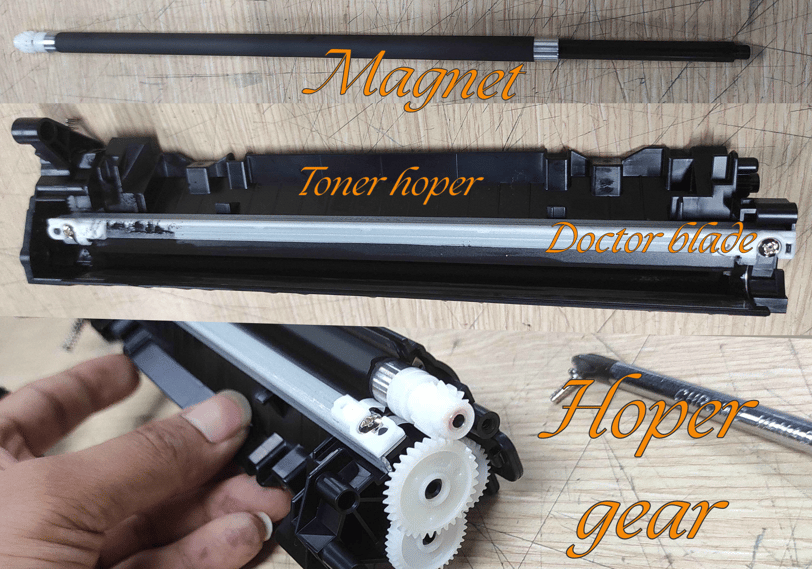
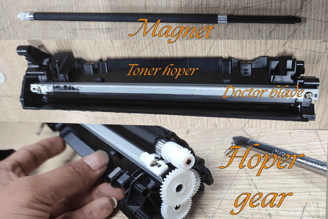
1. Toner Container Assembly
The toner container holds and distributes the toner powder needed for printing. Key components include:
Magnetic Roller (Developer Roller)
Contains a strong internal magnet that attracts and holds toner particles
Ensures uniform toner distribution across the drum for consistent print quality
Typically requires replacement after 80,000-100,000 pages
Toner Hopper
Main storage compartment holding the toner powder supply
Designed for smooth, continuous toner distribution throughout the printing process
Capacity varies by model (typically 2,500-10,000 pages)
Doctor Blade
Precision-engineered thin metal or plastic blade that regulates toner amount
Creates sharp, clear prints by maintaining proper toner layer thickness
Common wear item that may need replacement after 50,000-70,000 pages
Hopper Gears
Mechanical system that moves toner from the hopper to the developer unit
Ensures consistent toner flow during printing operations
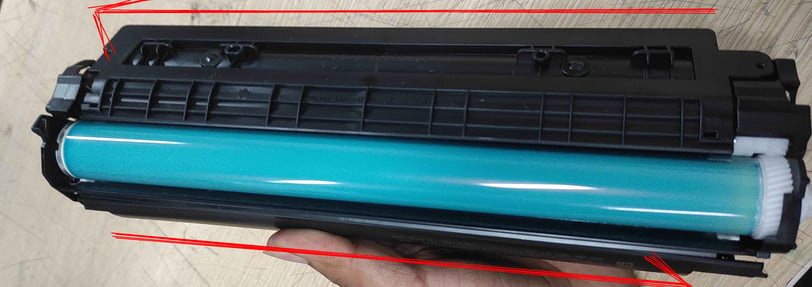
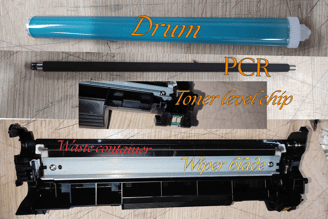
2. Drum Assembly (Imaging & Transfer Components)
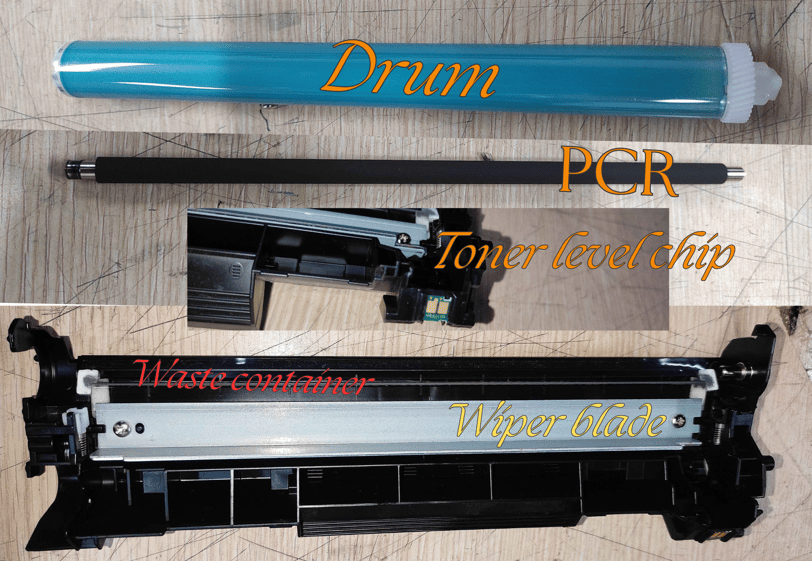
The drum assembly is critical to image formation and consists of:
Photosensitive Drum (OPC Drum)
Receives electrical charge from primary corona wire before laser exposure
Forms the electrostatic image that attracts toner particles
Transfers toner to paper during the printing process
Typical lifespan: 15,000-30,000 pages depending on usage and quality
Primary Charge Roller (PCR)
Applies a uniform negative charge to the drum before laser exposure
Helps reset the drum's charge after each print cycle
Critical for image quality and consistency
Toner Level Sensor Chip
Electronic component that accurately tracks remaining toner levels
Communicates with printer firmware to provide status updates
Triggers alerts when toner is low or requires replacement
Waste Toner Container
Collects unused toner scraped off by the wiper blade
Prevents toner buildup and contamination of internal components
May require emptying or replacement depending on model
Wiper Blade
Precision cleaning component that removes residual toner from the drum
Ensures no toner remains after each print cycle
Prevents streaks, smudges, and image quality issues
Common Toner Cartridge Issues & Expert Solutions
Based on my experience servicing over 1,000 toner-related issues, here are the most common problems and their solutions:
Light or Faded Prints
Cause: Uneven toner distribution or low toner levels Solution:
Remove the cartridge and gently rock it horizontally 5-6 times to redistribute toner
If problem persists, check toner levels and replace if necessary
Inspect the developer roller for wear or damage
Streaks or Smudges on Prints
Cause: Dirty drum, damaged wiper blade, or contaminated developer roller Solution:
Power down the printer and remove the toner cartridge
Inspect the drum and developer roller, cleaning with a lint-free cloth if necessary
Check the wiper blade for damage or wear
For persistent issues, consider replacing the drum unit
"Low Toner" Warning Appears Too Soon
Cause: Sensor calibration issues or toner level chip malfunction Solution:
Access your printer's maintenance menu (refer to your model's manual)
Look for toner counter reset option and follow prompts
If unsuccessful, contact manufacturer support for model-specific guidance
Toner Leakage
Cause: Damaged cartridge housing or improper handling Solution:
Power down printer and carefully remove the cartridge
Clean excess toner inside the printer using a toner vacuum (avoid regular vacuums)
Inspect the cartridge for cracks or damage
Replace if damaged to prevent further issues
Conclusion
Understanding toner cartridge components helps users improve print quality, extend cartridge lifespan, and effectively troubleshoot common errors. Based on my 15 years of experience:
Regular maintenance significantly reduces printing issues and extends equipment life
High-quality toner cartridges, while more expensive initially, offer better reliability and print quality
Following manufacturer guidelines for storage and handling prevents common failures
Frequently asked questions
Q: What does error code E202 mean on a Canon laser printer?
A: Based on my experience with Canon printers, E202 indicates a scanner unit malfunction. This typically requires checking the scanner connection cable and potentially replacing the scanner assembly if damage is found.
Q: How can I fix a "Downloading Mode" error on a Canon printer?
A: This firmware-related error often occurs after power interruptions. In my experience servicing this issue, performing a hard reset by disconnecting power for 60 seconds, then holding the GO button while reconnecting power resolves this 80% of the time. For persistent issues, the main controller board may require replacement.
Q: How long should a typical toner cartridge last?
A: Standard capacity toner cartridges typically yield 2,500-3,000 pages at 5% coverage, while high-capacity models can produce 10,000+ pages. However, actual yield varies based on printing content, environmental conditions, and printer maintenance.
Insights
Explore the latest in printer technology and tips.
Resources
Support
contact@bestprintershop.com
+918920029543
© 2024 BestPrinterShop . All rights reserved.