Photo Printing at Home: Professional Results on Budget Tips
Discover how to achieve professional photo printing at home without breaking the bank. Expert tips, best printers, paper types, and budget-friendly techniques.
5/22/20257 min read


Why Choose Home Photo Printing Over Commercial Services?
The appeal of home photo printing extends far beyond mere convenience. When you print at home, you maintain complete creative control over every aspect of the process, from colour calibration to paper selection. This level of control is particularly valuable for photographers who've spent considerable time perfecting their images in post-processing software.
Cost-effectiveness becomes apparent when printing multiple photos or experimenting with different papers and settings. Whilst the initial investment in equipment might seem substantial, the per-print cost drops dramatically compared to commercial services, especially for larger formats or frequent printing.
Professional print services, though excellent for one-off projects, can be restrictive in terms of paper choices and turnaround times. Home printing allows you to experiment freely, make adjustments on the fly, and have your prints ready within minutes rather than days.
Essential Equipment for Professional Home Photo Printing
Choosing the Right Printer
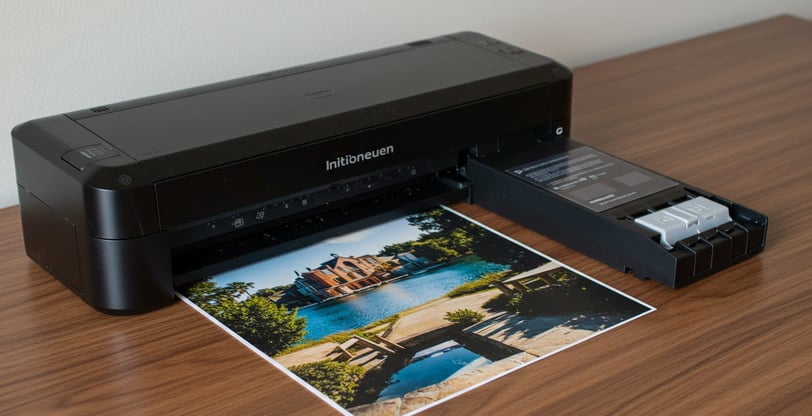
The foundation of excellent home photo printing lies in selecting an appropriate printer. Inkjet printers dominate the photo printing market, with two main categories to consider:
Dye-based ink printers excel at producing vibrant colours and smooth gradations, making them ideal for portraits and colourful landscapes. Canon's PIXMA series and Epson's Expression Photo line offer excellent entry-level options starting around £150-200.
Pigment-based ink systems provide superior longevity and are favoured by professional photographers. The Epson SureColor P800 and Canon imagePROGRAF PRO series represent the gold standard, though more affordable options like the Epson EcoTank Photo ET-8550 deliver impressive results for under £300.
Key features to prioritise include:
Minimum six-colour ink systems (CMYK plus light cyan and light magenta)
Support for various paper sizes up to A3+
Individual ink cartridges to minimise waste
High resolution capability (at least 5760 x 1440 dpi)
Monitor Calibration: The Foundation of Colour Accuracy
Even the finest printer cannot compensate for an uncalibrated monitor. What you see on screen must accurately represent what will appear on paper, making monitor calibration absolutely crucial for professional results.
Hardware calibration tools like the X-Rite ColorMunki Display or Datacolor SpyderX provide precise colour profiling. These devices, costing between £100-200, pay for themselves quickly by eliminating costly reprints and wasted materials.
The calibration process involves measuring your monitor's colour output and creating a custom profile that ensures consistent, accurate colours. Most calibration tools recommend monthly recalibration to maintain accuracy as monitor performance naturally degrades over time.
Paper Selection: The Canvas for Your Art
Paper choice dramatically influences the final appearance of your prints, often more than any other single factor. Understanding paper characteristics helps you match the medium to your artistic vision.
Glossy Papers
Glossy papers deliver maximum colour saturation and sharpness, making them ideal for vibrant landscapes, portraits with rich skin tones, and any image where colour pop is paramount. The reflective surface can be challenging under certain lighting conditions but produces truly striking results when viewed optimally.
Premium options include Epson Ultra Premium Photo Paper Glossy and Canon Photo Paper Pro Platinum, both offering exceptional colour gamut and sharpness.
Matte and Fine Art Papers
Matte surfaces eliminate reflective glare whilst providing subtle texture that complements black and white photography, portraits, and artistic images. Fine art papers, such as Hahnemühle Photo Rag or Canson Platine Fibre Rag, offer museum-quality archival properties and distinctive textures that elevate photography to fine art status.
These papers typically cost more per sheet but provide unmatched longevity and aesthetic appeal for special projects or gallery presentations.
Pearl and Luster Finishes
Representing a middle ground between glossy and matte, pearl and luster papers offer good colour saturation whilst minimising reflective glare. These versatile papers work well for most subjects and viewing conditions, making them excellent all-round choices for general photo printing.
Mastering Colour Management for Professional Results
Colour management represents perhaps the most technical aspect of home photo printing, yet it's essential for achieving consistent, predictable results. The process involves creating a seamless workflow from camera capture through monitor display to final print.
Understanding Colour Profiles
Every device in your workflow - camera, monitor, and printer - interprets colours differently. Colour profiles serve as translation tools, ensuring consistent colour reproduction across all devices.
Your camera captures images in a colour space, typically sRGB or Adobe RGB. Your monitor uses its own colour profile (ideally custom-calibrated), and your printer requires specific profiles for each paper type used.
Creating Printer Profiles
Many paper manufacturers provide free ICC profiles for popular printers, downloadable from their websites. These profiles optimise colour reproduction for specific printer-paper combinations and should always be used when available.
For ultimate precision, custom printer profiling using tools like the X-Rite i1Photo Pro 2 creates profiles tailored to your specific printer, inks, and environmental conditions. This advanced technique ensures the most accurate colour reproduction possible.
Step-by-Step Guide to Perfect Photo Prints
Image Preparation
Begin with the highest quality image files possible. RAW files offer maximum flexibility for colour correction and exposure adjustments, though high-quality JPEGs can produce excellent results with proper handling.
Resize your images to match the intended print dimensions at 300 DPI for optimal sharpness. Larger files can be resampled down without quality loss, but upsampling smaller images often results in softness or artifacts.
Apply output sharpening specifically designed for printing. This differs from capture or creative sharpening and compensates for the natural softening that occurs during the printing process.
Print Settings Configuration
Access your printer's advanced settings and disable all automatic colour corrections - you want complete manual control over the colour management process. Select the appropriate paper type setting to ensure optimal ink density and drying times.
Choose the highest quality print setting available, typically "Maximum Quality" or "Best Photo." This setting uses smaller ink droplets and multiple passes for superior detail and colour accuracy.
The Printing Process
Load paper carefully, ensuring correct orientation and secure positioning. Most photo papers have a specific print side, usually the whiter or shinier surface.
Create a test strip or small proof print before committing to full-size prints, especially when using new papers or printing particularly important images. This small investment in paper and ink can save considerable expense later.
Allow prints to dry completely before handling - this can take several hours depending on ink coverage and environmental conditions. Rushing this process can result in smudging or colour shifts.
Budget-Friendly Tips for Professional Results
Maximising Ink Efficiency
Generic ink cartridges, whilst controversial among some photographers, can deliver acceptable results for less critical applications at substantially lower costs. However, stick to reputable third-party manufacturers and avoid the cheapest options, which may clog print heads or fade prematurely.
Print in batches to maximise ink usage efficiency. Starting and stopping the printer frequently wastes ink through cleaning cycles, so plan printing sessions to include multiple images.
Paper Cost Management
Purchase paper in larger quantities when possible - bulk pricing can reduce per-sheet costs by 30-50%. Store unused paper in its original packaging within a cool, dry environment to prevent curling or moisture damage.
Consider slightly smaller print sizes for everyday images. An A4 print often provides nearly the same visual impact as A3 whilst using significantly less paper and ink.
Maintenance and Longevity
Regular printer maintenance prevents costly repairs and ensures consistent print quality. Run cleaning cycles monthly or when print quality deteriorates, and print at least once weekly to prevent ink from drying in the print heads.
Use your printer's borderless printing feature judiciously - it's convenient but uses more ink than bordered prints and can cause paper feeding issues over time.
Troubleshooting Common Issues
Colour Matching Problems
When prints don't match screen colours, the issue typically lies with monitor calibration or colour profile selection. Verify that you're using the correct ICC profile for your specific paper and that your monitor calibration is current.
Environmental lighting affects colour perception significantly. View prints under consistent, neutral lighting conditions - ideally daylight-balanced LED panels or natural north-facing window light.
Print Quality Issues
Banding or streaking usually indicates clogged print heads requiring cleaning cycles or, in severe cases, manual cleaning with appropriate solvents. Head alignment issues manifest as blurry or doubled text and images and require running the printer's alignment utility.
Paper handling problems often result from incorrect paper type settings or worn feed rollers. Ensure paper settings match the actual media loaded and clean feed rollers monthly with lint-free cloths.
Advanced Techniques for Exceptional Results
Black and White Printing
Monochrome printing benefits tremendously from dedicated black and white ink sets or printers designed specifically for grayscale work. The Epson SureColor P800 with its multiple black inks produces stunning black and white prints with rich tonal gradations.
When using colour printers for black and white work, converting to grayscale in post-processing software rather than relying on printer drivers typically yields superior results with better tonal control.
Large Format Printing
A3+ prints create dramatic impact whilst remaining achievable with consumer-level equipment. However, larger formats magnify any defects in image quality, paper handling, or colour accuracy, making careful preparation essential.
Consider the viewing distance when preparing large prints - images viewed from several feet away can tolerate slightly lower resolution than prints examined closely.
Achieving Professional Results on Any Budget
The path to professional-quality home photo printing doesn't require unlimited funds, but it does demand attention to detail and patience to master the process. Start with a capable printer in your budget range, invest in monitor calibration, and gradually expand your paper collection as experience grows.
Remember that professional results come from understanding your equipment's capabilities and limitations rather than simply owning expensive gear. A well-calibrated, properly maintained entry-level printer with quality paper often outperforms expensive equipment used carelessly.
The satisfaction of creating beautiful prints in your own home, combined with the creative freedom and cost savings, makes mastering home photo printing a worthwhile endeavour for any photography enthusiast.
Ready to start your home photo printing journey? What's holding you back from taking control of your photographic output? Share your experiences or questions about home photo printing in the comments below - we'd love to hear about your successes and challenges in achieving professional results at home.
Gone are the days when getting professional-quality photo prints meant queuing at the local print shop and paying premium prices. With the right knowledge, equipment, and techniques, you can create stunning photo prints from the comfort of your own home whilst saving substantial money in the process.
Whether you're a photography enthusiast looking to showcase your work or simply wanting to preserve precious family memories in physical form, home photo printing offers unparalleled convenience and control over your final results. Let's explore how you can achieve professional-grade prints without the professional price tag.
Insights
Explore the latest in printer technology and tips.
Resources
Support
contact@bestprintershop.com
+918920029543
© 2024 BestPrinterShop . All rights reserved.
